The digital signage ecosystem is a combination of screens, playback devices, networks, and content management processes. When these components are defined in advance, the installation of digital screens goes smoothly. Screen advertising becomes controllable and repeatable at all points. Planning also reduces manual work — content can be centrally uploaded and distributed to various digital media, which increases operational efficiency and makes the return on investment more predictable.
From business goals to screening scenarios
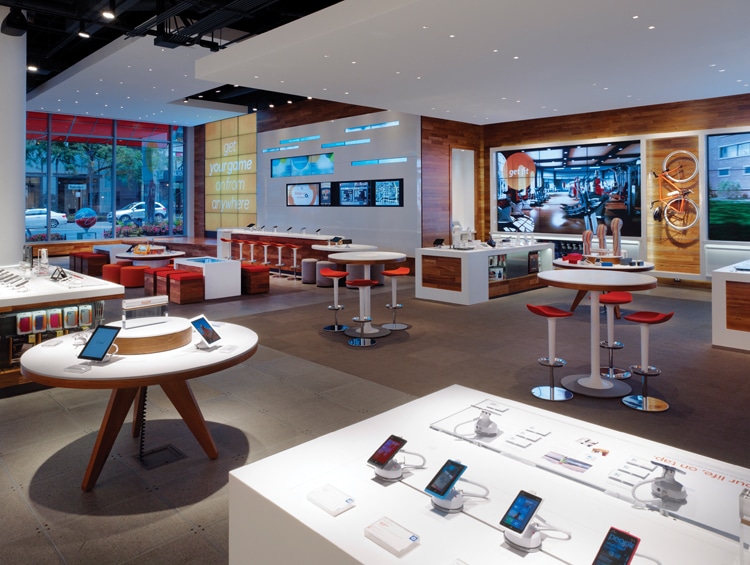
Start with the question: what exactly should the screen do? Inform in the storefront, sell in the hall, direct to kiosks, or support the service queue. For retailers, it is important to immediately describe typical playlists, update frequency, and requirements to keep the presentation relevant and standardized.
Once you have defined your business goals, it is easier to choose the format. Large-format screens for shop windows. Video walls for areas of interest. Separate panels for navigation. This approach simplifies budget justification in the business case and provides an understanding of the expected ROI by reducing manual work and increasing conversion from screens.
Components of the digital signage ecosystem
The basic set looks like this:

- Displays and mounts taking into account viewing distance and lighting
- Display players that play videos and graphics on a schedule
- Software platform for managing digital media, e.g., dsgo.pro
- Communication channel and access for quick material updates
- Content templates for creating emotionally appealing images without breaking style
A defined set of components allows you to plan procurement, installation, and subsequent operation as a system solution with predictable implementation and maintenance costs.
Team roles and typical compromises
Practical division of roles: marketing owns messages and templates, IT is responsible for the network and access, and the operations team is responsible for placement and schedules. The most common trade-offs are between brightness and viewing comfort, as well as between universal templates and local promotions.
Check cable routes, power points, and player locations before the installation team arrives. Otherwise, you will have to redo part of the installation. This division of roles reduces downtime and improves network consistency when scaling.
Now we prepare the site and ensure the safety of the installation.
A properly prepared site reduces downtime and speeds up the connection of digital signage on installation day. Installation safety begins not with fasteners, but with checking the surface, power supply, cable routes, and personnel access.
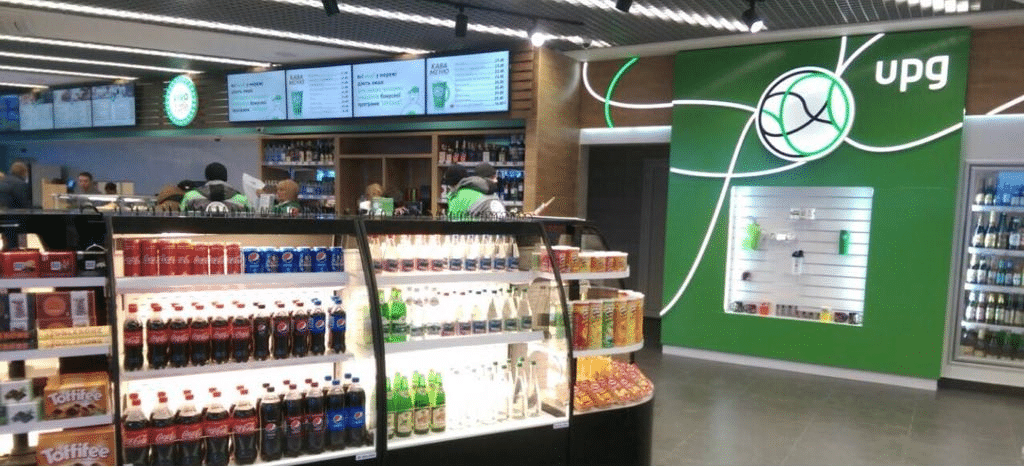
This is especially critical for retailers, where screens operate in storefronts and kiosks, and screen advertising must consistently reproduce video and emotionally appealing images.
What you need to prepare before the installers arrive
Determine the installation point, taking into account visibility, glare, and visitor traffic. Prepare the power supply and network where the display players and panels themselves will be located.

Laying cables in conduits provides faster access for servicing. Concealed wiring looks neater, but requires more preparatory work and approvals. Careful preparation reduces installation time and lowers operating costs for commissioning.
Step-by-step security and readiness check
- Check the load-bearing capacity of the wall or rack and compatibility with the type of mounting, especially if video walls are planned.
- Agree on cable routes: power, Ethernet, HDMI, or DisplayPort, and allow extra length for maintenance.
- Ensure ventilation and clearance for heat dissipation; do not cover the case vents.
- Organize protection against accidental shutdown: secure plugs, label circuit breakers, restrict access
- Prepare a test scenario: playback of video, sound check if necessary, verification of presentation standardization for various digital media
Organization of responsibility and access
Appoint a business representative who will open access points, approve cable routing locations, and confirm that content can be centrally downloaded and distributed.
Practical tip: schedule work outside peak hours. This will ensure visitor safety and avoid blocking the sales area.
The site is ready. You can proceed to installation and connection.
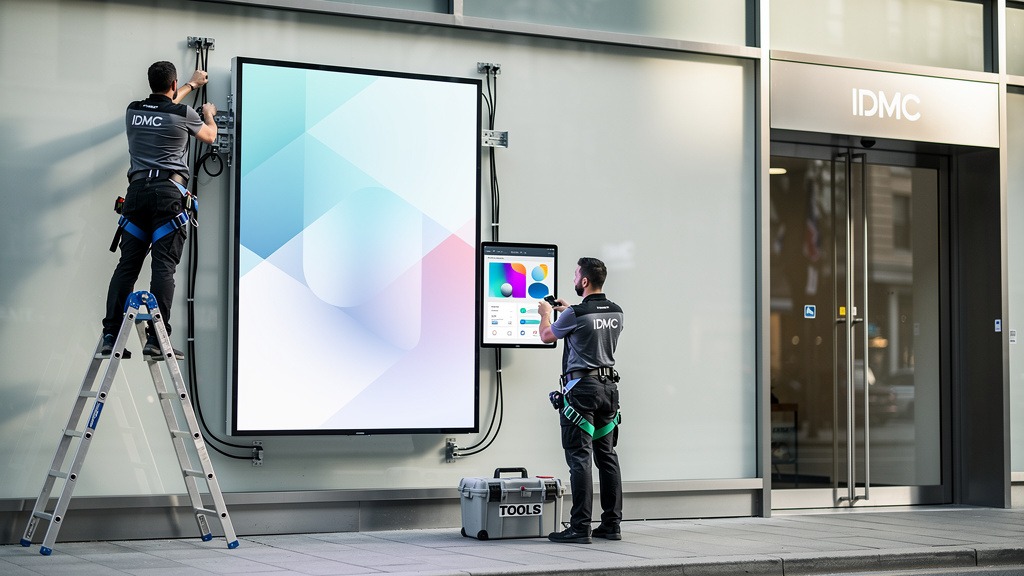
The correct sequence of work during the installation of digital screens and connection of digital signage reduces downtime and ensures stable video playback for screen advertising. The goal of this stage is simple: to securely mount the display, connect the power and signal, and prepare the channel so that content can be centrally uploaded and distributed to various digital media.
This is critical for retailers. Storefronts and kiosks require emotionally appealing images without manual touch-ups on site.
The essence of the process and responsible roles
A digital sign is a combination of a display and a signal source, such as display players or a built-in player. In a typical project, installation is performed by a contractor or facility engineer. The business process owner approves the placement, display scenarios, and requirements for standardizing the presentation at all points.
Installation and connection steps
- Agree on the installation point with regard to the viewer’s route — shop windows and ticket offices require a clear viewing angle.
- Mark the mounting points and check the plane; skewing increases the load on the bracket.
- Secure the mounting system and install the display — for widescreen displays, plan for two-person lifting and matrix protection.
- Lay power and signal cables with extra length for servicing, but without loops that pull on the connectors.
- Connect the content source, secure the ports, turn on the power, and verify that the image appears.
- Add a network connection — wired provides more predictable performance, wireless is faster for kiosk deployment
- Enable basic remote access so that the technical team can diagnose issues without visiting your location, including from mobile devices.
Quality control before commissioning
Check that the display is not overheating, that there is no tension on the cables, and that digital media is playing without desynchronization. A common mistake at sites is to skip labeling the inputs. This makes further display configuration more time-consuming and complicates the standardization of connections for multiple screens.
After physical installation, it is time to configure the image and display modes.
High-quality images on digital signage depend on the correct player output settings and basic display calibration for specific lighting conditions. Coordinated modes for one or more screens reduce manual content editing. The presentation remains relevant and standardized at all points.
This directly affects the readability of screen advertising in shop windows, kiosks, and service areas.
Basic image parameters for content readability
The configuration of digital displays begins with matching what the display player outputs with what the panel expects.
- Set the native display resolution in the player’s output settings to avoid blurring.
- Set the correct orientation, landscape or portrait, so that videos and layouts are not cropped.
- Turn off unnecessary enhancers if they create halos around text.
- Adjust brightness and contrast for lighting so that images do not “burn out” in bright areas or “fall flat” in dark areas.
Practical tip: Marketing sets the requirements for appearance, while IT or the integrator records the settings profile and applies it uniformly to all screens. This enhances the effectiveness of the solution at points of sale.
Step-by-step setup of one screen, two screens, and a video wall
- Check that the player can see the display and confirm the native resolution and frequency.
- Turn on 1:1 or Just Scan mode on the display to remove cropping scaling.
- Adjust the sharpness so that the contours of small text are clear without halos.
- For two screens, select “Extend Desktop” for different content or “Duplicate” for synchronized display.
- For a video wall, set a grid (e.g., 2×2), compensate for the frames, and set the correct order of the panels.
- Play the test video and static slide, check the geometry, skin color, and readability of price tags.
- Save your settings profile to quickly restore your configuration when replacing the display.
Quality control and safety of work at the point
Safety during setup means working only with secure access to buttons and ports, not blocking passageways, and not leaving cables in the customer area. Aggressive image enhancements may look more impressive, but they reduce the readability of prices and terms, which affects the effectiveness of advertising on cash registers.
Agreed profiles minimize such compromises and preserve business performance.
Once the display and modes have been agreed upon, we configure the content and its delivery to the screens.
A content management system, or CMS, is a software platform that allows you to create, plan, and deliver content to screens from a single center. This solution eliminates the problem of outdated files at various points and makes presentations relevant and standardized for screen advertising across the entire network.
Once installation and connection are complete, it is the CMS that determines the speed of updates and manageability.
What CMS offers for daily network operations
CMS helps you centrally upload and distribute content to various digital media, from storefronts and kiosks to video walls and large-format screens. Retailers get intuitive content management without manual copying.
Key opportunities to include in the business case:
- Brand templates and guidelines to ensure images and videos look consistent
- schedules and playlists by time, location, and screen format
- device groups and access roles to reduce errors in publications
- publication statuses to quickly check what each point shows
Practical limitations and liability
Designate the content owner and IT infrastructure owner in advance. A common mistake is not coordinating display settings with creative formats. This causes text and graphics to appear differently in different places.
Also, organize access control to players and the network so that content updates are performed only from authorized accounts.
Before concluding, we have compiled brief answers to the most frequently asked questions.
Concise answers help to quickly configure displays after installation and reduce improvisation when launching content. Guidelines also enhance the safety of sign installation.
Quick responses to screen settings
Question: How do I adjust the display so that the image looks normal? Answer: Start by selecting the image mode for spot lighting, then adjust the brightness and contrast so that the screen advertising is legible in shop windows and kiosks. Next, check the signal format from the display players, otherwise the video may appear stretched.
Question: How do I adjust screen sharpness? Answer: Reduce excessive sharpness to a level where text and logos do not have halos. Higher sharpness emphasizes noise in digital media, especially on widescreen displays.
The question of two screens and video walls
Question: How do I set up two screens? Answer: Determine whether it is duplication, extension of the workspace, or a video wall. Ensure that both displays have the same resolution and orientation.
Content and centralized management
Question: What is digital signage software? Answer: It is an intuitive planning environment for uploading and distributing content to various digital media without manual copies. This keeps presentations relevant and standardized for retailers, particularly in storefronts and kiosks where emotionally appealing images are required.
Question: Who should be responsible for updates? Answer: The process owner is usually marketing, while IT or a contractor, such as Dsgo.pro, controls players, access, and playback stability.
All that remains is to summarize the key steps and outline further actions.
Brief conclusion for businesses
Stable screen advertising is based on three pillars: secure signage installation, precise digital screen mounting, and controlled digital display configuration. When digital signage connections and content processes are coordinated, the presentation remains relevant and standardized. Videos and emotionally appealing images look equally good in shop windows and kiosks.
This increases the predictability of business indicators and makes ROI more predictable.
Roadmap for launch and scaling
- Define the target and format: widescreen displays, video walls, or single panels for different areas
- Assign process owners: IT is responsible for the network and display players, marketing is responsible for digital media, operations is responsible for point reviews.
- Perform acceptance testing: signal, power, and readability tests before opening.
- Set up a centralized cycle: content is easy to upload and distribute to various digital media
- Agree on a compromise: quick edits on the spot provide flexibility, but centralization provides control and repeatability.
This roadmap helps reduce operational costs and accelerate network scaling.
Benchmark for corporate level
If you need manageability in your network, establish uniform templates and access roles. This will allow you to standardize processes, reduce publication errors, and ensure a predictable return on investment.
This concludes the instructions, and you can now proceed with the implementation of your project.